
Hole to hole, snapped to centre.
Measure hole spacing on the simulated part in NC Proof. Point–point snaps to the centre of a hole by itself on the mill, and to the centreline on the lathe.
Before the part is cut, check the hole positions against the drawing. NC Proof measures the simulated part, so what you measure is what the program will make.
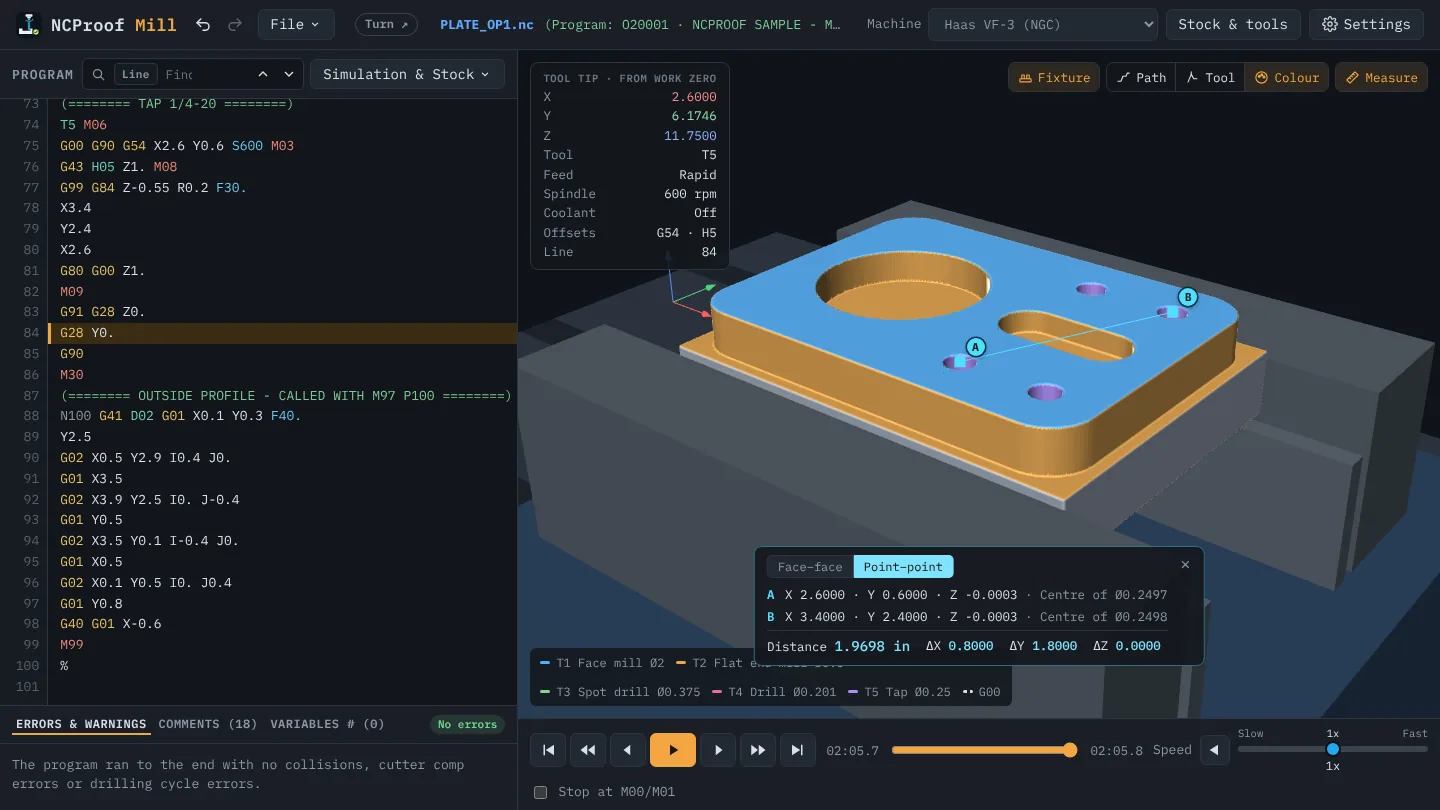
Snaps to the centre of the hole
- In NC Proof Mill, click near a hole and the point snaps to the centre of the hole by itself. You don’t have to hit the exact centre.
- The readout shows the hole diameter next to each point (for example Centre of Ø0.2497), so you know you got the hole you meant.
- Pick two holes and you get the distance plus ΔX, ΔY and ΔZ: bolt patterns and hole spacing read straight off.
- Points also snap to corners and edges. Hold Alt (Option on a Mac) for a free point that doesn’t snap.
On the lathe: snaps to the centreline
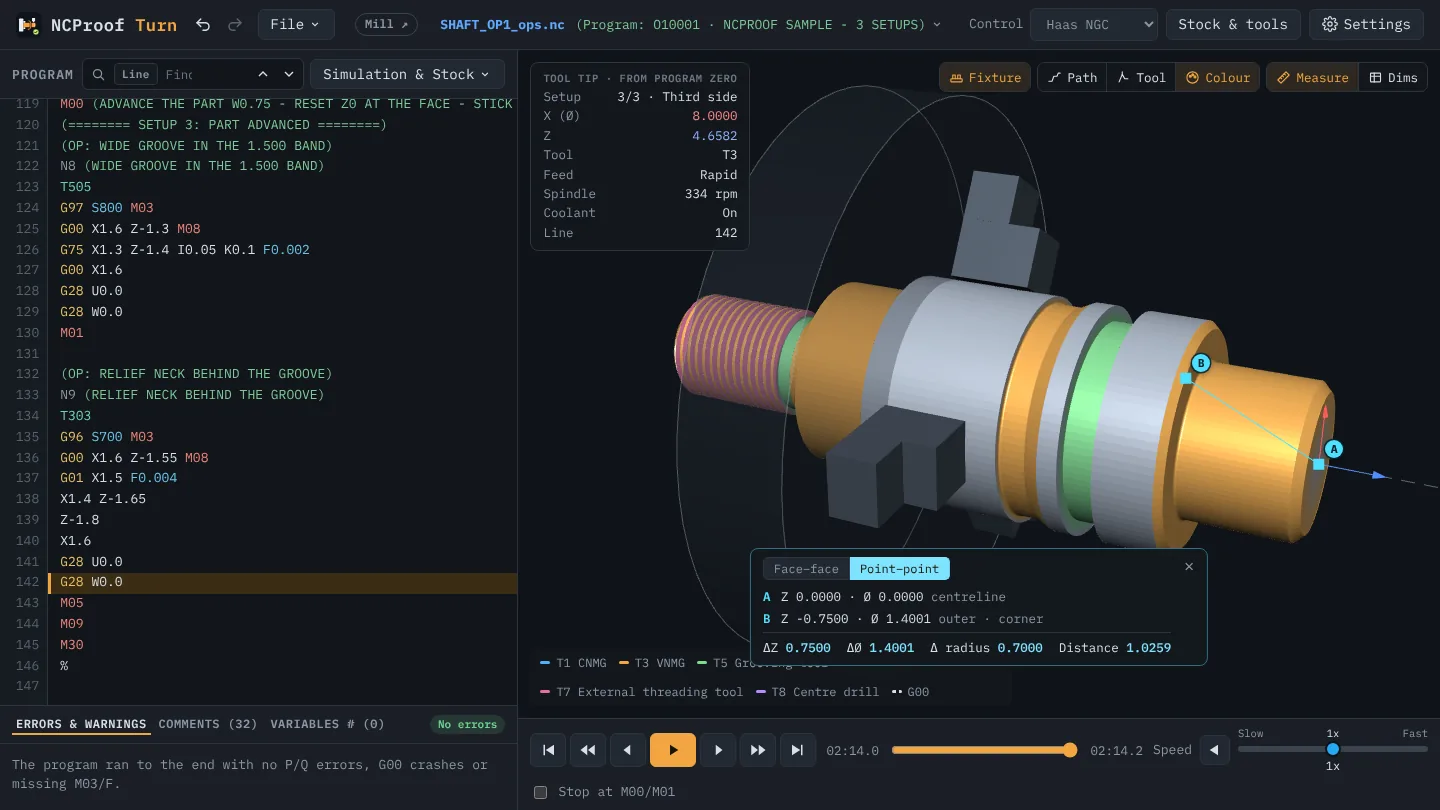
In NC Proof Turn, points snap to the centreline (the centre of the round part), shoulders and corners. The readout gives ΔZ, ΔØ and Δ radius as well as the distance, so a shoulder diameter or a length from the face is one click away.
How to use it
- Run the program to where you want to measure (often the end).
- Right-click in the 3D view and choose Measure → Point–point, or press Measure above the view and pick Point–point.
- Click the first point, then the second. Press Esc to clear and measure again.
Need the distance between two faces instead? See Face–face measure. Step-by-step help: Guide, section 8: Measure the part.